重新学习如何使用 Git 和 GitHub
非常推荐去看一看技术蛋老师的视频
Status
git status -s我没想到竟然还能加一个 -s 参数,它的输出是这样的
git status -s M pages/.obsidian/community-plugins.json M pages/.obsidian/core-plugins.json M pages/index.md M pages/posts/notes/editor-shortcut.md?? pages/.obsidian/core-plugins-migration.json?? pages/posts/blog/re-learn-git.md而直接使用 git status 命令的输出结果是这样的
git statusOn branch masterYour branch is up to date with 'origin/master'.
Changes not staged for commit:  (use "git add <file>..." to update what will be committed)  (use "git restore <file>..." to discard changes in working directory)  modified:   pages/.obsidian/community-plugins.json  modified:   pages/.obsidian/core-plugins.json  modified:   pages/index.md  modified:   pages/posts/notes/editor-shortcut.md
Untracked files:  (use "git add <file>..." to include in what will be committed)  pages/.obsidian/core-plugins-migration.json  pages/posts/blog/re-learn-git.md
no changes added to commit (use "git add" and/or "git commit -a")
其中,untracked files 是指一些可能是新增的,还没有被 git 追踪的文件,而上面的 modified 是指已经追踪的,并且已经修改过的文件。
Add
git add [file1] [file2] ...可以将一个或多个文件添加到缓冲区。
git add .可以将当前目录下的文件全部添加到缓冲区。
git add [dir]可以将某个目录下的文件添加到缓冲区内。
当使用 add 将文件添加到缓冲区后,这些文件就被标记为了 staged,如果不清楚的话,可以使用 VSCode 的 git 插件可视化的查看。
如果想要取消添加刚才的文件,可以点击 VSCode 的 unstage 操作。当然,也可以再次使用 git status 命令,查看当前状态。此时,它就会提醒我们用这条命令来取消添加
use "git restore --staged <file>..." to unstageCommit
提交并需要附带本次提交的信息。在 VSCode 的 Git 插件中,其实也给了 commit 附带提交信息的功能。
git commit -m 'commit message'其中,提交信息应当按照一定的格式来编写。一般的,如果只是使用 git commit 命令,将会引导用户进入一个很像 vim 的编辑界面。
1 2 # Please enter the commit message for your changes. Lines starting 3 # with '#' will be ignored, and an empty message aborts the commit. 4 # 5 # On branch master 6 # Your branch is up to date with 'origin/master'. 7 # 8 # Changes to be committed: 9 # modified: README.md10 #~提交格式应该是这样的1
<type>(<scope>): <subject><BLANKLINE><body><BLANKLINE><footer>type表示提交类别,必须存在scope表示修改范围subject表示标题行body表示主体的描述部分
type
| 关键字 | 说明 |
|---|---|
feat | 添加新特性 |
fix | 修复 bug |
docs | 仅仅修改了文档 |
style | 仅仅修改了空格、格式缩进、逗号等等,不改变代码逻辑 |
refactor | 代码重构,没有加新功能或者修复 bug |
perf | 优化相关,比如提升性能、体验 |
test | 增加测试用例 |
chore | 改变构建流程、或者增加依赖库、工具等 |
revert |
scope
非必填,用于说明 commit 影响的范围
subject
是 commit 的简短描述,必填,在 50 个字符以内。
- 动词开头,第一人称现在时
- 第一个字母小写
- 句尾不加句号
body
非必填,可以描述当前修改的详细信息或修改的目的。
footer
非必填,一般描述 BREAKING CHANGE. 以 BREAKING CHANGE 开头,后面是对变动的描述、以及变动理由和迁移方法。
一个样例
git config core.editor hx # 将默认编辑器更改为 hxgit add .git commit 1 chore: format README 2 3 Use the default feature of helix-editor to format README.
:wq保存后会自动提交信息。
git commit[master ccad09a] chore: format README 1 file changed, 6 insertions(+), 6 deletions(-)restore
前面提到了,用 restore 可以取消添加已经 stage 的文件,但是它还有其他的功能。如果在还未 add 的时候,使用 git status 可以看到有这样的提示
(use "git add <file>..." to update what will be committed)(use "git restore <file>..." to discard changes in working directory)int main() { return 0;}它可以取消所作的更改,万一你直接跑了这条命令,那么你在上一次提交之后写的代码就白写了。
rm
用于删除文件。
git rm [file]这条指令会将文件从暂存区和工作区删除。
如果删除之前修改过并且已经放到暂存区域的话,则必须要用强制删除选项 -f.
如果想把文件从暂存区域移除,但仍然希望保留在当前工作目录中,换句话说,仅是从跟踪清单中删除,使用 --cached 选项即可
git rm --cached <file>这条命令在我手中常用于
checkout
用于切换分支。-b 选项可以在当前提交的基础上新建一个分支并切换到该分支上。
~/Documents/project git:(main)git checkout -b dev~/Documents/project git:(dev)如果当前有多个分支时,可以使用 checkout 来切换到其他的分支
~/Documents/project git:(main)git checkout patch-1~/Documents/project git:(patch-1)branch
用于查看和管理分支。
查看分支
git branch main dev* patch-1 # 当前所在的分支查看本地和远程分支
git branch -a修改分支名称
git branch -m <old-name> <new-name>删除某个分支
~/Documents/project git:(main)git branch -D patch-1merge
合并分支。

~/Documents/project git:(feature)git checkout main~/Documents/project git:(main)git merge feature一直有人在争吵 merge 好还是 rebase 好,我真的觉得没什么必要,这还是得看使用场景。
merge 会留下一切可追溯的信息,也基本上是最常用的合并方式。在知乎的一条回答中2,rebase 的最大好处不是消除了 merge,而是避免与 merge 的交织。在下面的这个情况中,就有可能需要用到 rebase.

仓库主更新非常勤快,以至于你 fork 之后,在 dev 分支做了修改,想要 pull request 的时候,仓库主已经又加了很多次提交。此时,你可以先切换到主分支,拉取已经提交的修改,然后将自己的修改 rebase 一下,以最新的 commit 为基准来提交贡献,避免把的冲突留给太多的人去解决。
rebase
在 git-scm 官方文档 中有这么一个提示
变基的风险
呃,奇妙的变基也并非完美无缺,要用它得遵守一条准则:
如果提交存在于你的仓库之外,而别人可能基于这些提交进行开发,那么不要执行变基。
如果你遵循这条金科玉律,就不会出差错。 否则,人民群众会仇恨你,你的朋友和家人也会嘲笑你,唾弃你。
变基操作的实质是丢弃一些现有的提交,然后相应地新建一些内容一样但实际上不同的提交。 如果你已经将提交推送至某个仓库,而其他人也已经从该仓库拉取提交并进行了后续工作,此时,如果你用 git rebase 命令重新整理了提交并再次推送,你的同伴因此将不得不再次将他们手头的工作与你的提交进行整合,如果接下来你还要拉取并整合他们修改过的提交,事情就会变得一团糟。
总之,还是需要在合适的时候使用 rebase,而不是乱用一通。
下面是 merge 和 rebase 的一些区别。
rebase
git checkout featuregit rebase main经过上面两条命令,git 做了这样的操作。它本身的含义叫作 “变基”,在图中就是把 feature 分支上的修改挪到了 main 分支上。

适合 rebase 的情况通常为,当自己有多个分支,而想将某些分支合并在一起后再向主仓库 pull request,或者是当你想要 pull request 时,却发现 main 分支已经有了修改,为了避免冲突,你需要现将远程的 main 拉取下来合并,再将 feature 分支的修改变基到最新的节点上。
merge
git checkout maingit merge feature在 merge 操作中,git 做了下面这样的操作。当然,在此处的 merge 过程中,或许也会有一些 conflicts,需要我们手动处理。从下图中来理解,那就是 main 分支接受了 main 上和 feature 上双方的修改,也就是说,它几乎保留了所有分支的记录。
stash
某个人正在 dev 分支上开发新功能,但是有人发了一个 issue,说 main 分支上有个非常严重的 Bug,急需修复。dev 分支还没开发完,此时只提交一半的修改,这样不是很好。他直接使用 git checkout main 命令,却得到了这样一串报错。
git checkout mainerror: Your local changes to the following files would be overwritten by checkout: readme.mdPlease commit your changes or stash them before you switch branches.Aborting因为此时,git 树(链表)的结构是这样的

此时,如果直接切换分支,那么 dev 分支的修改应该何去何从?
如果不想提前提交,那么就需要使用 git stash 了。这条命令会将当前修改存储在一个栈中,并标记当前分支是 WIP (Work in progress),此时就可以切回 main 分支了。
~/Documents/project git:(dev)git stashSaved working directory and index state WIP on dev: a0262af chore: first commit~/Documents/project git:(dev)git checkout mainSwitched to branch 'main'~/Documents/project git:(main)等待他修好 main 分支,将所有更改都提交后,再切回 dev 分支,使用下面的命令从栈中取出前面最近一次保存的,未提交的修改:
~/Documents/project git:(dev)git stash popOn branch devChanges not staged for commit:  (use "git add <file>..." to update what will be committed)  (use "git restore <file>..." to discard changes in working directory)  modified:   readme.md
no changes added to commit (use "git add" and/or "git commit -a")Dropped refs/stash@{0} (47e2c480a199ff07025b31c83e1c7a62592c1974)
当然,也可以在栈中保存多个快照,使用 git stash list 查看所有保存的快照。
最后,等到 dev 分支开发完成,提交所有代码后,可以使用 merge 或者 rebase 进行合并。
- 如果他是仓库主,有 main 的操作权限,将 dev 分支合并到 main,处理冲突之后,提交到远端
- 如果他只是贡献者,没有 main 的操作权限,可以将 dev 分支 rebase 到最新的 main 尾部,然后再提交 pull request
reset
reset 用于回退版本,可以指定回退某一次提交的版本
git reset HEAD^ # 回退到上个版本git reset HEAD~2 # 回退到上上个版本git reset 052e34 # 回退到指定版本,版本号可以通过 git log 查看其中,可以添加 --soft 和 --hard 参数选项
--soft会将提交信息回退到以前的版本,但是已经做出的修改不会被撤销--hard会撤销工作区中所有未提交的修改内容,将暂存区与工作区都回到指定的版本,并删除之前的所有信息提交

revert
revert 也能用于回退版本,它用来重做某一个 commit 提交的内容。这么说可能并不明白到底做了什么,还得是看图。

git revert HEAD^这条命令将当前状态恢复到了上一次提交的状态,但与 reset 不同的是,他不会删除以前已经提交过的信息,而是创建一个新的 commit,将回退到之前版本所需要进行的变更写到这个 commit 中。因此,它整个 git 树是前进的,而不是倒退的。
关于开发
reset vs. revert
在一个大项目的主分支中,版本一定是只能前进,不能后退的。因为其他所有人都是依据你这个主分支 fork 出来的分支来进行开发的。如果你使用 reset 命令,那么所有人都必须一同删除这些 commit。而如果将某个提交 (我们称之为 C1) 删除了,有可能会导致基于 C1 开发的分支都面临很大的风险。
而 revert 只是相当于所有人都接受了一个新的提交,并不会对那些其他分支造成太大的污染。因此,在某个工程的主分支中,应尽可能使用 revert,而避免使用 reset.
但是对于你自己开发的分支,发现提交错了,reset 也没事。

如何 pull request
首先要明确一点,就是任何主分支都是雷打不动地向前迈进的,使用删除记录的方式回退的风险上面也都阐述了。
其次,pull request 应当是将某个仓库的一个分支(通常是主分支)fork 过来,然后基于这个分支开发。
接着,或许你对这个仓库非常了解,甚至有很多个好的点子想贡献给仓库原作者,那么你应当开多个 pull request,每个 PR 处理一个 feature,而避免在一个 PR 中编写不相关的、过多的特性。
最后,你应当基于这个 fork,另开一个 branch 再进行修改,而不是在你 fork 来的分支上直接修改。为什么?请看下图。

发现问题了吗?
什么?你竟然看不出来?
在这棵 git 树中,出现了 “你合我,我合你” 的现象。如果你还看不出来,那么你可以看一下我曾经提过的一个 PR.
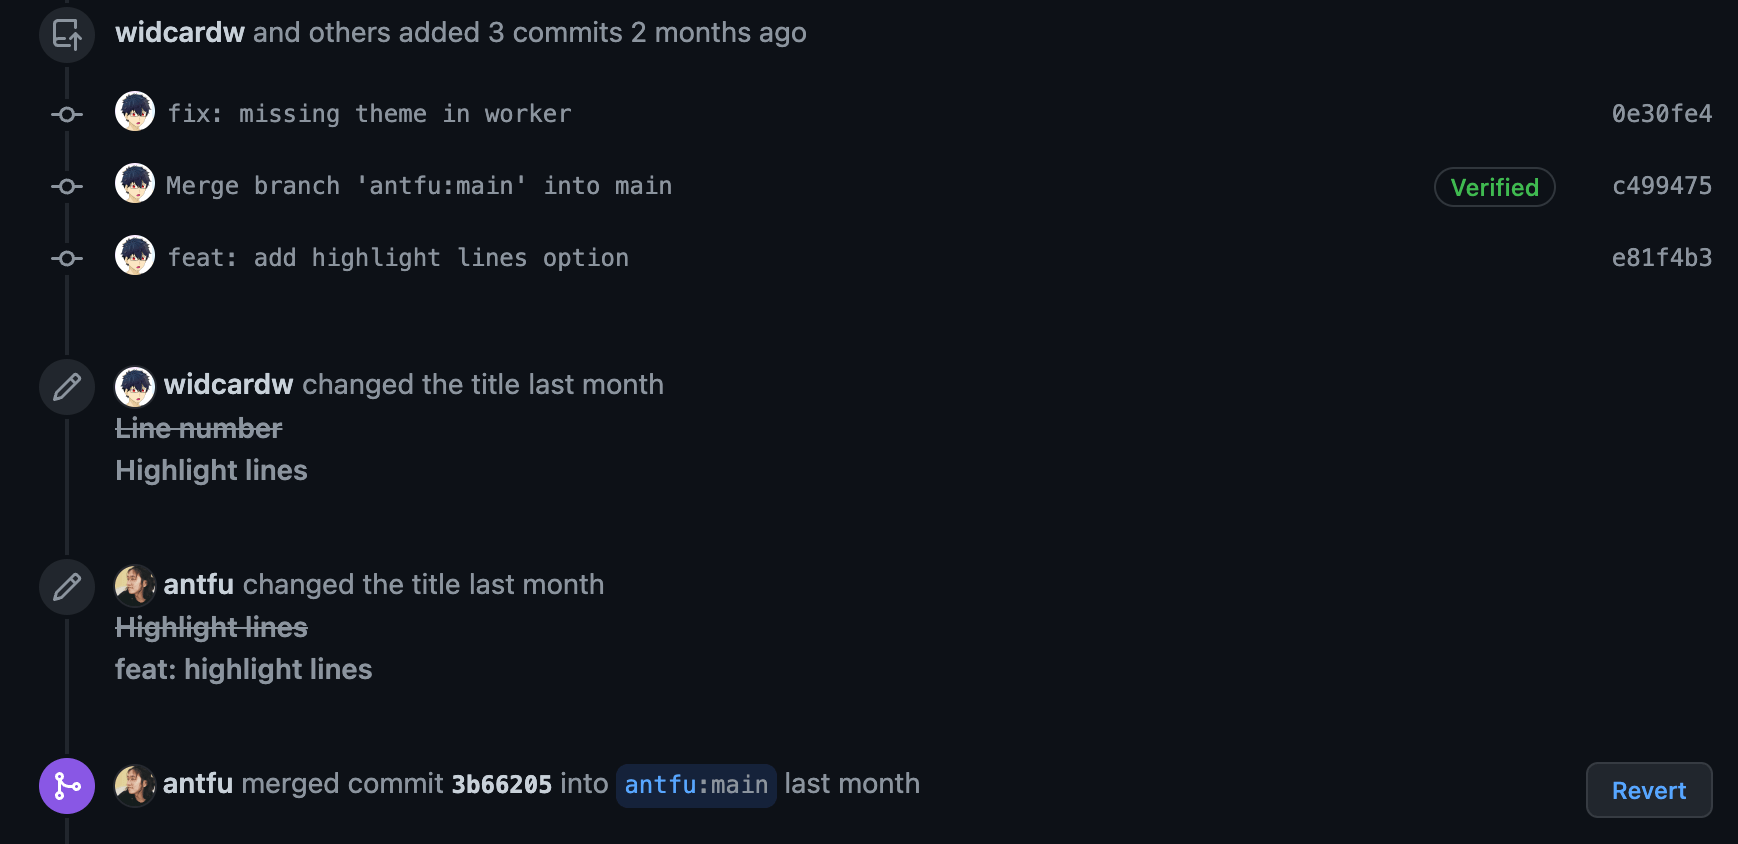
我给 markdown-it-shiki 提过两次 PR,而且两次都是在 main 分支直接修改的。Antfu 好像使用了 rebase 来合并修改,而如果我想要继续提 PR,我想我应该先更新到最新的版本,然后再进行修改,这样应该是理所应当的。
而当我使用 git pull 来拉取最新的代码时,发现我竟然还需要把仓库原作者的提交也给合并到我自己的分支中。这样其实就陷入了无止境的相互合并当中,虽然仓库原作者需要合并是理所当然的,但是我还需要再合并,这就很不应该。从这次 PR 当中,我深刻体会到了开发的规范性在这方面的重要性。
说得这么沉重,还是来看一个比较规范的 PR 例子吧。仓库链接是 cunzaizhuyi/bat-sharp
在这个仓库的贡献中,我几乎每次加新功能时,都开启了一个新的分支。在 PR 被合并之后,我只需在 widcardw/bat-sharp 中点一下 就可以拉取最新的、已经合并的代码。后续贡献中,我只需切换到 master 分支,pull 一下最新代码,就可以得到与远程一模一样的状态,不再需要重新 merge 仓库原作者做出的更改了。我现在多出来的,不过是一些分支罢了,反正这些分支已经合并到主分支了,删与不删其实都无所谓了,删除分支并不意味着删除 commit3.
使用 GitHub 官方的工具 gh
修改并合并 Pull Request
一般来说,如果收到他人的 PR,他的代码改得非常好,可以 merge,那么我们通常会直接点击 GitHub 页面上的 就好了。
但是别人的代码有时并不像我们自己想的那样好,我们可以在 PR 下留下评论,要求他做出修改。
然而,如果是一些小问题,我们可以直接代为修改,那么就可以使用 gh 工具来完成了。下面是我问 New Bing 得到的解答。
Bing 的回答
One possible way to fix typos and merge a pull request with gh pr is:
- Check out the pull request locally with
gh pr checkout 1where1is the pull request number - Make changes to the code and commit them
- Push the changes to the remote branch of the pull request
- Merge the pull request with
gh pr merge 1
Alternatively, you can also use gh pr to comment on the pull request and ask the author to fix the typos themselves.
具体操作就是
- 使用
gh pr checkout 1命令行,将这个 PR 拿到本地,其中1就是 PR 的楼层数 - 做出你想要的修改,然后提交
- 将变更推送到 PR 的远程端
- 使用
gh pr merge 1将这个 PR 合并到主分支
然而第三步中,直接使用 git push 是不对的,这样会推送到自己仓库的分支,于是我又问了问 New Bing.
Bing 的回答
To push changes to the remote branch of a pull request, you need to use the git push command with the name of the remote and the name of the branch¹. For example, if you checked out a pull request from a contributor named contrib1 and their branch was named feat1, you can use:
git push contrib1 feat1This will send your changes to their forked repository and update the pull request².
Alternatively, you can also create a new branch on your own repository and push your changes there. For example:
git checkout -b contrib1-feat1git push -u origin contrib1-feat1This will create a new branch on your repository and set it as upstream for your local branch. Then you can manually compose a URL for a new pull request or use gh pr create².
Does this answer your question? 😊
(1) Top Git Commands | How to Use Git Commands | Devmountain. https://devmountain.com/blog/top-git-commands-how-to-use/(2) GitHub Pull Request without fork | Scientific Computing | SciVision. https://www.scivision.dev/github-pull-request-no-fork/ (3) [automated] Merge branch ‘release/7.0.2xx’ => ‘release/7.0.3xx’. https://github.com/dotnet/sdk/pull/31108
果然不负众望,New Bing 已经是我最得力的助手了。
Footnotes
-
这个知乎的文章可以不看,明显的就是一边倒,捧一踩一 ↩
-
详情见 https://qastack.cn/programming/10765321/should-i-delete-a-branch-after-merging-it ↩
#git #GitHub #workflow